Difference between revisions of "3D Graphics View"

m (unlinked icons) |
|||
| Line 8: | Line 8: | ||
|} | |} | ||
| − | The [[File:Perspectives_algebra_3Dgraphics.svg|link=|16px]] ''3D Graphics View'' is part of the [[File:Perspectives algebra 3Dgraphics.svg|link=|16px]] [[Perspectives#3D_Graphics_View_Perspective|''3D Graphics Perspective'']], although you may add a [[File:Perspectives_algebra_3Dgraphics.svg|link=|16px]] ''3D Graphics View'' window to any [[Perspectives#Customized_Perspectives|''Perspective'']] at any time by using the [[File:Menu-view.svg|link=|16px]] ''[[View Menu]]'' or the [[File:Stylingbar_dots.svg|link=|16px]] ''Views button'' in the [[Style_Bar | + | The [[File:Perspectives_algebra_3Dgraphics.svg|link=|16px]] ''3D Graphics View'' is part of the [[File:Perspectives algebra 3Dgraphics.svg|link=|16px]] [[Perspectives#3D_Graphics_View_Perspective|''3D Graphics Perspective'']], although you may add a [[File:Perspectives_algebra_3Dgraphics.svg|link=|16px]] ''3D Graphics View'' window to any [[Perspectives#Customized_Perspectives|''Perspective'']] at any time by using the [[File:Menu-view.svg|link=|16px]] ''[[View Menu]]'' or the [[File:Stylingbar_dots.svg|link=|16px]] ''Views button'' in the [[Style_Bar|''Style Bar'']]. |
==Customizing the 3D Graphics View== | ==Customizing the 3D Graphics View== | ||
Latest revision as of 09:03, 3 September 2015
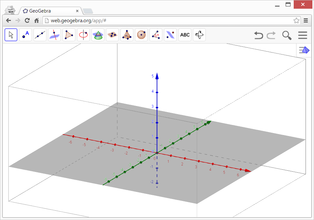
 3D Graphics View User Interface
By default, the ![]() 3D Graphics View is opened next to the
3D Graphics View is opened next to the ![]() Algebra View. In addition, either the Input Bar is displayed at the bottom of the GeoGebra window (GeoGebra Desktop), or an Input Field is integrated directly in the
Algebra View. In addition, either the Input Bar is displayed at the bottom of the GeoGebra window (GeoGebra Desktop), or an Input Field is integrated directly in the ![]() Algebra View (GeoGebra Web and Tablet Apps). The 3D Graphics View Toolbar is displayed at the top of the GeoGebra window, with the
Algebra View (GeoGebra Web and Tablet Apps). The 3D Graphics View Toolbar is displayed at the top of the GeoGebra window, with the ![]()
![]() Undo / Redo buttons in the top right corner.
Undo / Redo buttons in the top right corner.
|
The ![]() 3D Graphics View is part of the
3D Graphics View is part of the ![]() 3D Graphics Perspective, although you may add a
3D Graphics Perspective, although you may add a ![]() 3D Graphics View window to any Perspective at any time by using the
3D Graphics View window to any Perspective at any time by using the ![]() View Menu or the
View Menu or the ![]() Views button in the Style Bar.
Views button in the Style Bar.
Customizing the 3D Graphics View
You can customize the ![]() 3D Graphics View according to the mathematical topic you want to work with. The basic setup can be changed using the 3D Graphics View Style Bar (e.g. display of coordinate axes, xOy-plane, grid). In addition, the Preferences Dialog provides more options to customize the
3D Graphics View according to the mathematical topic you want to work with. The basic setup can be changed using the 3D Graphics View Style Bar (e.g. display of coordinate axes, xOy-plane, grid). In addition, the Preferences Dialog provides more options to customize the ![]() 3D Graphics View.
You may also change the layout of GeoGebra’s user interface according to your needs.
3D Graphics View.
You may also change the layout of GeoGebra’s user interface according to your needs.
Creating Mathematical Objects
Constructions with the Mouse
Using the construction Tools available in the 3D Graphics View Toolbar you can create geometric constructions in the ![]() 3D Graphics View with the mouse. Select any construction tool from the 3D Graphics View Toolbar and read the tooltip provided in the
3D Graphics View with the mouse. Select any construction tool from the 3D Graphics View Toolbar and read the tooltip provided in the ![]() 3D Graphics View in order to find out how to use the selected Tool.
3D Graphics View in order to find out how to use the selected Tool.
- click and hold the mouse key (tap and hold) in order to define it's x- and y-coordinate, then
- drag the point up or down in order to change the z-coordinate and
- release the click (tap) once you reached the desired coordinates.
3D Graphics View Toolbar
The 3D Graphics View Toolbar provides a wide range of Tools that can be operated with the mouse and allow you to create the three-dimensional graphical representations of objects directly in the ![]() 3D Graphics View.
Every icon in the Toolbar represents a Toolbox that contains a selection of related construction Tools. In order to open a Toolbox, you need to click on the corresponding default Tool shown in the 3D Graphics View Toolbar (GeoGebra Web and Tablet Apps) or on the small arrow in the lower right corner of the Toolbar icon (GeoGebra Desktop).
3D Graphics View.
Every icon in the Toolbar represents a Toolbox that contains a selection of related construction Tools. In order to open a Toolbox, you need to click on the corresponding default Tool shown in the 3D Graphics View Toolbar (GeoGebra Web and Tablet Apps) or on the small arrow in the lower right corner of the Toolbar icon (GeoGebra Desktop).
Direct Input using the Input Bar
GeoGebra’s ![]() 3D Graphics View supports points, vectors, lines, segments, rays, polygons, and circles in a three-dimensional coordinate system. You may either use the Tools provided in the 3D Graphics View Toolbar, or directly enter the algebraic representation of these objects in the Input Bar or Input Field of the
3D Graphics View supports points, vectors, lines, segments, rays, polygons, and circles in a three-dimensional coordinate system. You may either use the Tools provided in the 3D Graphics View Toolbar, or directly enter the algebraic representation of these objects in the Input Bar or Input Field of the ![]() Algebra View (GeoGebra Web and Tablet Apps).
Algebra View (GeoGebra Web and Tablet Apps).
A=(5, -2, 1) into the Input Bar or Input Field of the Furthermore, you may now create surfaces, planes, as well as geometric solids (pyramids, prisms, spheres, cylinders, and cones).
f(x, y)=sin(x*y) in order to create the corresponding surface.
Commands
In addition to the wide range of Commands available for the other Views of GeoGebra, there also is a selection of 3D Commands specifically for the 3D Graphics View.
A=(2, 2, 0), B=(-2, 2, 0), C=(0, -2, 0), and D=(0, 0, 3). Input the command Pyramid[A, B, C, D] and hit the Enter key in order to create the pyramid with base ABC and apex D.
Moving Mathematical Objects in 3D
Move Tool
Using the ![]() Move Tool you may drag and drop Free Points in the
Move Tool you may drag and drop Free Points in the ![]() 3D Graphics View. In order to move a point in the three-dimensional coordinate system, you can switch between two modes by clicking on the point:
3D Graphics View. In order to move a point in the three-dimensional coordinate system, you can switch between two modes by clicking on the point:
- Mode xOy-plane: You may move the point parallel to the xOy-plane without changing the z-coordinate.
- Mode z-axis: You may move the point parallel to the z-axis without changing the x- and y-coordinates.
Moving Objects using Keyboard Shortcuts
In the ![]() 3D Graphics View, you may use the Page Up key in order to move a selected object up and the Page Down key in order to move a selected object down.
3D Graphics View, you may use the Page Up key in order to move a selected object up and the Page Down key in order to move a selected object down.
Display of Mathematical Objects
Translation of the Coordinate System
You may translate the coordinate system by using the ![]() Move Graphics View Tool and dragging the background of the
Move Graphics View Tool and dragging the background of the ![]() 3D Graphics View with your pointing device. Thereby, you can switch between two modes by clicking on the background of the
3D Graphics View with your pointing device. Thereby, you can switch between two modes by clicking on the background of the ![]() 3D Graphics View:
3D Graphics View:
- Mode xOy-plane: You may translate the scene parallel to the xOy-plane.
- Mode z-axis: You may translate the scene parallel to the z-axis.
Alternatively you can hold the Shift key and drag the background of the ![]() 3D Graphics View in order to translate the coordinate system. Again, you need to click in order to switch between the two modes while holding the Shift key.
3D Graphics View in order to translate the coordinate system. Again, you need to click in order to switch between the two modes while holding the Shift key.
Rotation of the Coordinate System
You may rotate the coordinate system by using the ![]() Rotate 3D Graphics View Tool and dragging the background of the
Rotate 3D Graphics View Tool and dragging the background of the ![]() 3D Graphics View with your pointing device.
3D Graphics View with your pointing device.
Alternatively you can right-drag the background of the ![]() 3D Graphics View in order to rotate the coordinate system.
3D Graphics View in order to rotate the coordinate system.
If you want to continue the rotation of the coordinate system when the mouse is released, you may use the option ![]() Start Rotating the View and
Start Rotating the View and ![]() Stop Rotating the View in the 3D Graphics View Style Bar.
Stop Rotating the View in the 3D Graphics View Style Bar.
Viewpoint in front of an Object
You may use the ![]() View in front of Tool in order to view the coordinate system from a viewpoint in front of the selected object.
View in front of Tool in order to view the coordinate system from a viewpoint in front of the selected object.
Zoom
You may use the ![]() Zoom In Tool and
Zoom In Tool and ![]() Zoom Out Tool in order to zoom in the
Zoom Out Tool in order to zoom in the ![]() 3D Graphics View.
3D Graphics View.
3D Graphics View Style Bar
The 3D Graphics View Style Bar contains buttons to
 show / hide the coordinate axes,
  the xOy-plane, and a
  grid in the xOy-plane
- go
 back to default view
 - change the
 Point Capturing settings
  start / stop rotating the view automatically
- adjust the
 view direction
  choose the type of projection
- open the
 Properties Dialog (GeoGebra Web and Tablet Apps)
 - display additional
 Views in the GeoGebra window (GeoGebra Web and Tablet Apps)
Style Bar for Tools and Objects
Depending on the Tool or object you select, the buttons in the Style Bar adapt to your selection. Please see Style Bar Options for Tools and Objects for more information.