Tutorial:Punti medi

Nota: Questo tutorial è basato sui GeoGebra Tutorial Series di Mathematics and Multimedia
Problema: Scoprire cosa accade collegando i punti medi dei lati consecutivi di un quadrilatero.
In questo tutorial utilizzeremo GeoGebra per scoprire cosa accade quando si collegano i punti medi dei lati consecutivi di un quadrilatero. Impareremo a utilizzare i seguenti strumenti: Muovi, Punto medio o centro, Segmento - tra due punti, e Poligono. Per applicare direttamente questo tutorial passo per passo, aprire la finestra di GeoGebra.
Figura 1 - Un triangolo equilatero formato dai raggi di due circonferenze.
La costruzione di questo triangolo ci introduce all'utilizzo dello strumento Circonferenza e alla visualizzazione delle misure degli angoli interni di un poligono e delle misure dei lati. È comunque possibile tracciare un poligono regolare utilizzando lo strumento Poligono regolare.
1 Innanzitutto nascondiamo la Vista Algebra e gli Assi cartesiani. Per nascondere gli assi, fare clic su Visualizza nella barra dei menu, quindi fare clic su Assi. Per nascondere la Vista Algebra, fare clic su Visualizza, quindi su Vista Algebra.
2 Click the New Point button, and then click four distinct places on drawing pad forming the vertices of a quadrilateral.
3 If the labels of the points are not displayed, click the Move button, right click each point and click Show label from the context menu. (The context menu is the pop-up menu that appears when you right click an object.)
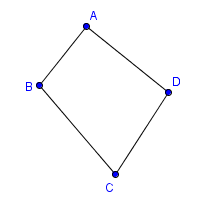
4 Select the Segment between two Points tool and click point A and click point B two distinct points to construct segment AB. To construct BC, with the Segment between two points tool still active, click point B and another location to create segment BC. Repeat until ABCD is formed. After step 4, your drawing should look like Figure 1 below.
5 Click the Move button and move the vertices of the quadrilateral. What do you observe?
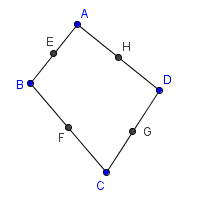
6 To determine the midpoint of each side of the quadrilateral, click the inverted triangle at the bottom right of the New Point button and choose Midpoint or Center tool from the list. Click the segments in the following order: AB, BC, CD and AD.
7 Select the Move button, right click the midpoints and click Show label from the context menu. After step 7, your drawing should look like Figure 2..
8 Move the vertices of the quadrilateral. What do you observe?
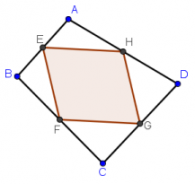
9 To have a better view, let us connect the midpoints of the quadrilateral using the Polygon tool. To do this, click the Polygon tool and click the points in the following order: Point E, point F, point G, point H and then point E again to close the polygon.
10 Move the vertices of the quadrilateral. What do you observe about the figure?
11 What conjecture can you make based on your observation?


