「空間図形ビュー」の版間の差分

| 1行目: | 1行目: | ||
<noinclude>{{Manual Page|version=5.0}}</noinclude>{{gui|view}} | <noinclude>{{Manual Page|version=5.0}}</noinclude>{{gui|view}} | ||
| − | =[[File:Perspectives_algebra_3Dgraphics.svg|link=|24px]] | + | =[[File:Perspectives_algebra_3Dgraphics.svg|link=|24px]] 空間図形ビューのユーザーインターフェース= |
| − | + | デフォルトでは, [[File:Perspectives_algebra_3Dgraphics.svg|link=|16px]] ''空間図形ビュー'' は [[File:Menu_view_algebra.svg|link=|Algebra View|16px]] ''数式ビュー'' の隣に表示される. | |
| + | さらに,GeoGebraデスクトップでは''[[入力バー]]'' がGeoGebraウィンドウの下部に表示され,GeoGebraウェブ・タブレットアプリでは ''[[入力フィールド]]'' が[[File:Menu_view_algebra.svg|link=|Algebra View|16px]] ''[[数式ビュー]]'' に直接統合されている.GeoGebraウィンドウの上部には [[空間図形ツール|''空間図形のツールバー'']] があり,右上隅には [[File:Menu-edit-undo.svg|link=|16px]][[File:Menu-edit-redo.svg|link=|16px]] ''元に戻す/やり直す'' ボタンが配置されている. | ||
{| cellpadding ="10" | {| cellpadding ="10" | ||
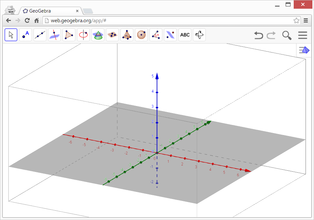
|[[File:3D-Graphics-View.png|left|link=|x220px]] | |[[File:3D-Graphics-View.png|left|link=|x220px]] | ||
| − | <br> | + | <br>空間図形ビュー |
|} | |} | ||
| − | + | [[File:Perspectives_algebra_3Dgraphics.svg|link=|16px]] ''空間図形ビュー'' は [[File:Perspectives_algebra_3Dgraphics.svg|link=|16px]] [[パースペクティブ#数間図形パースペクティブ|''空間図形パースペクティブ'']]'の一部であるが, [[File:Menu-view.svg|link=|16px]] ''[[表示メニュー]]'' または ''[[スタイルバー]]'' の [[File:Stylingbar_dots.svg|link=|16px]] ''表示ボタン'' を使って,いつでも[[パースペクティブ#空間図形パースペクティブ|''パースペクティブ'']] に[[File:Perspectives_algebra_3Dgraphics.svg|link=|16px]] ''空間図形ビュー'' ウィンドウを追加できる. | |
| − | == | + | ==空間図形ビューのカスタマイズ== |
| − | + | [[File:Perspectives_algebra_3Dgraphics.svg|link=|16px]] ''空間図形ビュー'' は,扱う数学的トピックに応じてカスタマイズすることができる.基本的な設定は,[[スタイルバー#空間図形ビューのスタイルバー|''空間図形ビューのスタイルバー'']] を使って変更できる(座標軸,''xy'' 平面,グリッドの表示など).さらに,''[[設定ダイアログ]]'' には,[[File:Perspectives_algebra_3Dgraphics.svg|link=|16px]] ''空間図形ビュー'' をカスタマイズするためのオプションが用意されている.また,GeoGebra の[[GeoGebra_5.0_デスクトップ_vs.ウェブ・タブレットアプリ#ユーザーインターフェースのレイアウトをカスタマイズする|ユーザーインターフェースのレイアウト]]を必要に応じて変更することもできる. | |
| − | |||
| − | = | + | =数学オブジェクトの作成= |
| − | == | + | ==マウスを使った作成== |
| − | + | [[#空間図形ビューのツールバー|''空間図形ビューのツールバー'']]で利用可能な[[空間図形ツール|作図''ツール'']]を使って.マウスで[[File:Perspectives_algebra_3Dgraphics.svg|link=|16px]] ''空間図形ビュー'' 内に幾何学的な作図を作成することができる. | |
| − | {{note| | + | ''空間図形ビューのツールバー'' から作図[[空間図形ツール|作図''ツール'']] を選択すると,その使用方法を説明するツールチップが表示される. |
| − | {{Example|1= | + | {{note|[[File:Perspectives_algebra_3Dgraphics.svg|link=|16px]] ''空間図形ビュー'' で作成したオブジェクトは,[[File:Menu_view_algebra.svg|link=|Graphics View|16px]] ''[[数式ビュー]]'' でも代数的に表現される.}} |
| − | {{hint| | + | {{Example|1= [[File:Mode sphere2.svg|link=|16px]] ''[[中心と通る点で決まる球面_ツール]]'' を選択し,''空間図形ビュー'' で2回クリックする.1回目のクリックで中心点,2回目のクリックで球体状の点を指定し,球体が作成される.}} |
| − | * | + | {{hint|3次元空間に新しい点を作るには... |
| − | * | + | * マウスキーをクリックして押し続ける(またはタップして押し続ける)ことで,点の ''x'' 座標と ''y'' 座標を指定し,その後 |
| − | * | + | * 点を上下にドラッグして ''z'' 座標を変更し |
| + | * 目的の座標に到達したら,クリック(タップ)を離す.}} | ||
==空間図形ビューのツールバー== | ==空間図形ビューのツールバー== | ||
| − | + | [[空間図形ツール|''空間図形ビューのツールバー'']]には,オブジェクトのの三次元グラフィカルな表現をマウス操作で[[File:Perspectives_algebra_3Dgraphics.svg|link=|16px]] ''空間図形ビュー'' に直接作成するための ''[[ツール]]'' が用意されている. | |
| − | + | ''[[ツールバー]]'' の各アイコンは,関連する[[ツール|作図 ''ツール'' ]]の一連を含む[[ツール#ツールボックス|''ツールボックス'']] を表している.''ツールボックス'' を開くためには,''空間図形ビューのツールバー'' に表示されている対応するデフォルトの ''ツール'' (GeoGebraウェブ・タブレットアプリ)をクリックするか,または ''ツールバー'' アイコンの右下隅にある小さな矢印(GeoGebraデスクトップ)をクリックする. | |
[[File:Toolbar-3D-Graphics.png|left|link=|3D Graphics Tools|x32px]] | [[File:Toolbar-3D-Graphics.png|left|link=|3D Graphics Tools|x32px]] | ||
| 31行目: | 32行目: | ||
<br> | <br> | ||
| − | {{note| | + | {{note| |
| + | ''空間図形ビューのツールバー'' の ''ツール'' は,生成されるオブジェクトの性質や ''ツール'' の機能に応じて整理されている.異なるタイプの平面を作成する ''ツール'' は [[File:Mode_planethreepoint.svg|link=|16px]] [[空間図形ツール#平面ツール|''平面ツールボックス'']] に,立体を作成する ''ツール'' は[[File:Mode_pyramid.svg|link=|16px]] [[空間図形ツール#空間図形ツール|''立体ツールボックス'']]に含まれている.}} | ||
| − | == | + | ==入力バーへ直接入力== |
| − | + | GeoGebraの[[File:Perspectives_algebra_3Dgraphics.svg|link=|16px]] ''空間図形ビュー'' は,3次元座標系における点,ベクトル,直線,線分,半直線,多角形,円をサポートしている.これらのオブジェクトを作成するには,[[空間図形ツール|''空間図形ビューのツールバー'']] に提供されている ''[[ツール]]'' を利用するか,または[[File:Menu_view_algebra.svg|link=|Algebra View|16px]] ''[[数式ビュー]]'' の ''[[入力バー]]'' (GeoGebraデスクトップ)または ''[[入力バー|''入力フィールド'']] にこれらのオブジェクトの代数的表現を直接入力することができる. | |
| − | + | {{Example|1=[[File:Menu_view_algebra.svg|link=|Algebra View|16px]] ''[[数式ビュー]]'' の ''入力バー'' または ''入力フィールド'' に<code>A=(5, -2, 1)</code>と入力して,3次元座標系に点を作成する.}} | |
| − | + | さらに,曲面,平面,および幾何学的立体(角錐,角柱,球体,円柱,円錐)も作成できるようになった. | |
| − | {{Example|1= | + | {{Example|1=<code>f(x, y)=sin(x*y)</code> と入力すると,対応する局面が生成される.}} |
| − | == | + | ==コマンド== |
| − | + | GeoGebra の他の ''[[表示|ビュー]]'' で利用可能な幅広い[[カテゴリ:コマンド|''コマンド'']] に加え,''空間図形ビュー'' 専用の ''空間図形コマンド''も用意されている. | |
| − | {{Example|1= | + | {{Example|1=<code>A=(2, 2, 0)</code>, <code>B=(-2, 2, 0)</code>, <code>C=(0, -2, 0)</code>, <code>D=(0, 0, 3)</code>とする.コマンド<code>Pyramid(A, B, C, D)</code> と入力し {{KeyCode|Enter}} キーを押すと,底面が ''ABC'' で頂点が ''D'' の三角錐を作成する.}} |
| − | = | + | =空間で数学オブジェクトを動かす= |
| − | == | + | ==移動ツール== |
| − | + | [[File:Mode_move.svg|link=|Move Tool|16px]] ''[[移動_ツール]]'' を使って,[[File:Perspectives_algebra_3Dgraphics.svg|link=|16px]] ''空間図形ビュー'' で[[自由、従属、補助オブジェクト|''自由点'']]をドラッグ&ドロップすることができる.3次元座標系で点を移動するためには,点をクリックして2つのモードを切り替えることが可能: | |
| − | *''' | + | *''' ''xy'' 平面モード''': ''z'' 座標を変えずに点を ''xy'' 平面に平行移動させる. |
| − | *''' | + | *''' ''z'' 軸モード''': ''x'' 座標と ''y'' 座標を変えずに,''z'' 軸に平行に点を動かす. |
| − | == | + | ==キーボードショートカットを使ったオブジェクトの移動== |
| − | + | [[File:Perspectives_algebra_3Dgraphics.svg|link=|16px]] ''空間図形ビュー'' では,選択したオブジェクトを上に移動するには {{KeyCode|Page Up}} キーを,下に移動するには {{KeyCode|Page Down}} キーを使用する. | |
| − | = | + | =数学オブジェクトの表示= |
| − | == | + | ==座標系の平行移動== |
| − | + | [[File:Mode_translateview.svg|link=|16px]] ''[[グラフィックスビューの移動_ツール]]'' を使用して,ポインティングデバイスで[[File:Perspectives_algebra_3Dgraphics.svg|link=|16px]] ''空間図形ビュー'' の背景をドラッグすることにより,座標系を平行移動させることができる.これによって,[[File:Perspectives_algebra_3Dgraphics.svg|link=|16px]] ''空間図形ビュー'' の背景をクリックすることで,2つのモード間で切り替えが可能である: | |
| − | *''' | + | *''' ''xt'' 平面モード''': 画面全体を ''xy'' 平面に沿って平行移動させることができる. |
| − | *''' | + | *''' ''z'' 軸モード''': 画面全体を ''z'' 軸に沿って平行移動させることができる. |
| − | + | または,{{KeyCode|Shift}}キー を押しながら[[File:Perspectives_algebra_3Dgraphics.svg|link=|16px]] ''空間図形ビュー'' の背景をドラッグして,座標系を平行移動させることもできる.2つのモードを切り替えるには,{{KeyCode|Shift}}キーを押しながらクリックする必要がある. | |
| − | {{note| | + | {{note|[[スタイルバー#空間図形ビューのスタイルバー|''空間図形ビューのスタイルバー'']]の [[File:Stylingbar_graphicsview_standardview.svg|link=|16px]] ''デフォルトビューに戻る'' ボタンをクリックすると,デフォルトビューに戻ることができる.}} |
| − | == | + | ==座標系の回転== |
| − | + | [[File:Mode_rotateview.svg|link=|Rotate 3D Graphics View Tool|16px]] ''[[空間図形ビューを回転する_ツール]]'' を使用して,ポインティングデバイスで[[File:Perspectives_algebra_3Dgraphics.svg|link=|16px]] ''空間図形ビュー'' の背景をドラッグすることにより,座標系を回転させることができる. | |
| − | + | または,[[File:Perspectives_algebra_3Dgraphics.svg|link=|16px]] ''空間図形ビュー'' の背景を右ドラッグして,座標系を回転させることもできる. | |
| − | + | マウスを放した後も座標系の回転を続けさせる場合は,[[スタイルバー#空間図形ビューのスタイルバー|''空間図形ビューのスタイルバー'']]の [[File:Stylingbar_graphics3D_rotateview_play.svg|link=|16px]] ''ビューの回転の開始''と[[File:Stylingbar_graphics3D_rotateview_pause.svg|link=|16px]] ''ビューの回転の停止'' のオプションを利用できる. | |
| − | {{note| | + | {{note|[[スタイルバー#空間図形ビューのスタイルバー|''空間図形ビューのスタイルバー'']]の [[File:Stylingbar_graphics3D_standardview_rotate.svg|link=|16px]] ''デフォルトビューに回転して戻る'' ボタンをクリックすると,デフォルトビューに戻ることができる.}} |
| − | == | + | ==オブジェクトの前の視点== |
| − | + | 選択したオブジェクトの前方から座標系を見るためには,[[File:Mode_viewinfrontof.svg|link=|16px]] ''[[ビューを揃える ツール]]''を使用する. | |
| − | == | + | ==ズーム== |
| − | + | [[File:Perspectives_algebra_3Dgraphics.svg|link=|16px]] ''空間図形ビュー'' をズームするには,[[File:Mode_zoomin.svg|link=Zoom In Tool|16px]] ''[[ズームイン_ツール]]'' と[[File:Mode_zoomout.svg|link=Zoom Out Tool|16px]] ''[[ズームアウト_ツール]]'' を使用する. | |
| − | {{hint| | + | {{hint|マウスのホイールを使ってズームすることもできる.}} |
| − | == | + | ==空間図形ビューのスタイルバー== |
| − | + | [[スタイルバー#空間図形ビューのスタイルバー|''空間図形ビューのスタイルバー'']] には,以下のボタンがある. | |
| − | *[[File:Stylingbar_graphics3D_axes_plane.svg|link=|16px]] | + | *[[File:Stylingbar_graphics3D_axes_plane.svg|link=|16px]] 座標軸,[[File:Stylingbar_graphics3D_plane.svg|link=|16px]] ''xy'' 平面,および ''xy'' 平面内の[[File:Stylingbar_graphicsview_show_or_hide_the_grid.svg|link=|16px]]グリッドの 表示/非表示 |
| − | * | + | * [[File:Stylingbar_graphicsview_standardview.svg|link=|16px]] デフォルトビューに戻す |
| − | * | + | *[[File:Stylingbar_graphicsview_point_capturing.svg|link=|16px]] ''[[点をつかむ]]'' 設定を変更 |
| − | *[[File:Stylingbar_graphics3D_rotateview_play.svg|link=|16px]] | + | *[[File:Stylingbar_graphics3D_rotateview_play.svg|link=|16px]] ビューの自動回転の開始/停止 |
| − | * | + | * [[File:Stylingbar_graphics3D_view_xy.svg|link=|16px]] ビューの向きの調整 |
| − | *[[File:Stylingbar_graphics3D_view_orthographic.svg|link=|16px]] | + | *[[File:Stylingbar_graphics3D_view_orthographic.svg|link=|16px]] 投影の方法を選択 |
| − | * | + | *[[File:Menu-options.svg|link=|16px]] ''[[プロパティダイアログ]]'' を開く(GeoGebraウェブ・タブレットアプリ) |
| − | * | + | *GeoGebra ウィンドウに追加の [[File:Stylingbar_dots.svg|link=|16px]] ''[[表示|ビュー]]'' を表示 (GeoGebraウェブ・タブレットアプリ) |
| − | == | + | ==ツールとオブジェクトのスタイルバー== |
| − | + | 選択した ''[[ツール]]'' やオブジェクトによって,''[[スタイルバー]]'' のボタンが変わる.詳しくは,[[スタイルバー#ツールとオブジェクトのスタイルバーオプション|ツールとオブジェクトのスタイルバーオプション]]を参照のこと. | |
2024年4月13日 (土) 04:44時点における最新版
 空間図形ビューのユーザーインターフェース
デフォルトでは, ![]() 空間図形ビュー は
空間図形ビュー は ![]() 数式ビュー の隣に表示される.
さらに,GeoGebraデスクトップでは入力バー がGeoGebraウィンドウの下部に表示され,GeoGebraウェブ・タブレットアプリでは 入力フィールド が
数式ビュー の隣に表示される.
さらに,GeoGebraデスクトップでは入力バー がGeoGebraウィンドウの下部に表示され,GeoGebraウェブ・タブレットアプリでは 入力フィールド が![]() 数式ビュー に直接統合されている.GeoGebraウィンドウの上部には 空間図形のツールバー があり,右上隅には
数式ビュー に直接統合されている.GeoGebraウィンドウの上部には 空間図形のツールバー があり,右上隅には ![]()
![]() 元に戻す/やり直す ボタンが配置されている.
元に戻す/やり直す ボタンが配置されている.
|
![]() 空間図形ビュー は
空間図形ビュー は ![]() 空間図形パースペクティブ'の一部であるが,
空間図形パースペクティブ'の一部であるが, ![]() 表示メニュー または スタイルバー の
表示メニュー または スタイルバー の ![]() 表示ボタン を使って,いつでもパースペクティブ に
表示ボタン を使って,いつでもパースペクティブ に![]() 空間図形ビュー ウィンドウを追加できる.
空間図形ビュー ウィンドウを追加できる.
空間図形ビューのカスタマイズ
![]() 空間図形ビュー は,扱う数学的トピックに応じてカスタマイズすることができる.基本的な設定は,空間図形ビューのスタイルバー を使って変更できる(座標軸,xy 平面,グリッドの表示など).さらに,設定ダイアログ には,
空間図形ビュー は,扱う数学的トピックに応じてカスタマイズすることができる.基本的な設定は,空間図形ビューのスタイルバー を使って変更できる(座標軸,xy 平面,グリッドの表示など).さらに,設定ダイアログ には,![]() 空間図形ビュー をカスタマイズするためのオプションが用意されている.また,GeoGebra のユーザーインターフェースのレイアウトを必要に応じて変更することもできる.
空間図形ビュー をカスタマイズするためのオプションが用意されている.また,GeoGebra のユーザーインターフェースのレイアウトを必要に応じて変更することもできる.
数学オブジェクトの作成
マウスを使った作成
空間図形ビューのツールバーで利用可能な作図ツールを使って.マウスで![]() 空間図形ビュー 内に幾何学的な作図を作成することができる.
空間図形ビューのツールバー から作図作図ツール を選択すると,その使用方法を説明するツールチップが表示される.
空間図形ビュー 内に幾何学的な作図を作成することができる.
空間図形ビューのツールバー から作図作図ツール を選択すると,その使用方法を説明するツールチップが表示される.
- マウスキーをクリックして押し続ける(またはタップして押し続ける)ことで,点の x 座標と y 座標を指定し,その後
- 点を上下にドラッグして z 座標を変更し
- 目的の座標に到達したら,クリック(タップ)を離す.
空間図形ビューのツールバー
空間図形ビューのツールバーには,オブジェクトのの三次元グラフィカルな表現をマウス操作で![]() 空間図形ビュー に直接作成するための ツール が用意されている.
ツールバー の各アイコンは,関連する作図 ツール の一連を含むツールボックス を表している.ツールボックス を開くためには,空間図形ビューのツールバー に表示されている対応するデフォルトの ツール (GeoGebraウェブ・タブレットアプリ)をクリックするか,または ツールバー アイコンの右下隅にある小さな矢印(GeoGebraデスクトップ)をクリックする.
空間図形ビュー に直接作成するための ツール が用意されている.
ツールバー の各アイコンは,関連する作図 ツール の一連を含むツールボックス を表している.ツールボックス を開くためには,空間図形ビューのツールバー に表示されている対応するデフォルトの ツール (GeoGebraウェブ・タブレットアプリ)をクリックするか,または ツールバー アイコンの右下隅にある小さな矢印(GeoGebraデスクトップ)をクリックする.
入力バーへ直接入力
GeoGebraの![]() 空間図形ビュー は,3次元座標系における点,ベクトル,直線,線分,半直線,多角形,円をサポートしている.これらのオブジェクトを作成するには,空間図形ビューのツールバー に提供されている ツール を利用するか,または
空間図形ビュー は,3次元座標系における点,ベクトル,直線,線分,半直線,多角形,円をサポートしている.これらのオブジェクトを作成するには,空間図形ビューのツールバー に提供されている ツール を利用するか,または![]() 数式ビュー の 入力バー (GeoGebraデスクトップ)または 入力フィールド にこれらのオブジェクトの代数的表現を直接入力することができる.
数式ビュー の 入力バー (GeoGebraデスクトップ)または 入力フィールド にこれらのオブジェクトの代数的表現を直接入力することができる.
さらに,曲面,平面,および幾何学的立体(角錐,角柱,球体,円柱,円錐)も作成できるようになった.
f(x, y)=sin(x*y) と入力すると,対応する局面が生成される.コマンド
GeoGebra の他の ビュー で利用可能な幅広い に加え,空間図形ビュー 専用の 空間図形コマンドも用意されている.
A=(2, 2, 0), B=(-2, 2, 0), C=(0, -2, 0), D=(0, 0, 3)とする.コマンドPyramid(A, B, C, D) と入力し Enter キーを押すと,底面が ABC で頂点が D の三角錐を作成する.空間で数学オブジェクトを動かす
移動ツール
![]() 移動_ツール を使って,
移動_ツール を使って,![]() 空間図形ビュー で自由点をドラッグ&ドロップすることができる.3次元座標系で点を移動するためには,点をクリックして2つのモードを切り替えることが可能:
空間図形ビュー で自由点をドラッグ&ドロップすることができる.3次元座標系で点を移動するためには,点をクリックして2つのモードを切り替えることが可能:
- xy 平面モード: z 座標を変えずに点を xy 平面に平行移動させる.
- z 軸モード: x 座標と y 座標を変えずに,z 軸に平行に点を動かす.
キーボードショートカットを使ったオブジェクトの移動
![]() 空間図形ビュー では,選択したオブジェクトを上に移動するには Page Up キーを,下に移動するには Page Down キーを使用する.
空間図形ビュー では,選択したオブジェクトを上に移動するには Page Up キーを,下に移動するには Page Down キーを使用する.
数学オブジェクトの表示
座標系の平行移動
![]() グラフィックスビューの移動_ツール を使用して,ポインティングデバイスで
グラフィックスビューの移動_ツール を使用して,ポインティングデバイスで![]() 空間図形ビュー の背景をドラッグすることにより,座標系を平行移動させることができる.これによって,
空間図形ビュー の背景をドラッグすることにより,座標系を平行移動させることができる.これによって,![]() 空間図形ビュー の背景をクリックすることで,2つのモード間で切り替えが可能である:
空間図形ビュー の背景をクリックすることで,2つのモード間で切り替えが可能である:
- xt 平面モード: 画面全体を xy 平面に沿って平行移動させることができる.
- z 軸モード: 画面全体を z 軸に沿って平行移動させることができる.
または,Shiftキー を押しながら![]() 空間図形ビュー の背景をドラッグして,座標系を平行移動させることもできる.2つのモードを切り替えるには,Shiftキーを押しながらクリックする必要がある.
空間図形ビュー の背景をドラッグして,座標系を平行移動させることもできる.2つのモードを切り替えるには,Shiftキーを押しながらクリックする必要がある.
座標系の回転
![]() 空間図形ビューを回転する_ツール を使用して,ポインティングデバイスで
空間図形ビューを回転する_ツール を使用して,ポインティングデバイスで![]() 空間図形ビュー の背景をドラッグすることにより,座標系を回転させることができる.
空間図形ビュー の背景をドラッグすることにより,座標系を回転させることができる.
または,![]() 空間図形ビュー の背景を右ドラッグして,座標系を回転させることもできる.
空間図形ビュー の背景を右ドラッグして,座標系を回転させることもできる.
マウスを放した後も座標系の回転を続けさせる場合は,空間図形ビューのスタイルバーの ![]() ビューの回転の開始と
ビューの回転の開始と![]() ビューの回転の停止 のオプションを利用できる.
ビューの回転の停止 のオプションを利用できる.
オブジェクトの前の視点
選択したオブジェクトの前方から座標系を見るためには,![]() ビューを揃える ツールを使用する.
ビューを揃える ツールを使用する.
ズーム
![]() 空間図形ビュー をズームするには,
空間図形ビュー をズームするには,![]() ズームイン_ツール と
ズームイン_ツール と![]() ズームアウト_ツール を使用する.
ズームアウト_ツール を使用する.
空間図形ビューのスタイルバー
空間図形ビューのスタイルバー には,以下のボタンがある.
 座標軸,
座標軸, xy 平面,および xy 平面内の
 グリッドの 表示/非表示
 デフォルトビューに戻す
 点をつかむ 設定を変更
 ビューの自動回転の開始/停止
 ビューの向きの調整
 投影の方法を選択
 プロパティダイアログ を開く(GeoGebraウェブ・タブレットアプリ)
- GeoGebra ウィンドウに追加の
 ビュー を表示 (GeoGebraウェブ・タブレットアプリ)
ツールとオブジェクトのスタイルバー
選択した ツール やオブジェクトによって,スタイルバー のボタンが変わる.詳しくは,ツールとオブジェクトのスタイルバーオプションを参照のこと.