運算區

 運算區介面
運算區介面
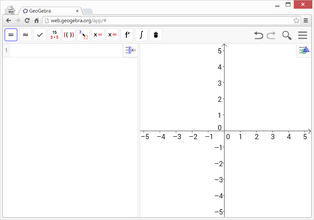
預設情況下,![]() 運算區會放在
運算區會放在 ![]() 繪圖區旁邊。上方所顯示的工具列會因為你目前所在的視區不同而顯示不同的工具列,若你正在編輯運算區,則上方所顯示的工具列是「運算區工具列」;若正在編輯繪圖區,則會切換為「繪圖工具列」。「復原」、「重複」按鈕放置在視窗的右上角。
繪圖區旁邊。上方所顯示的工具列會因為你目前所在的視區不同而顯示不同的工具列,若你正在編輯運算區,則上方所顯示的工具列是「運算區工具列」;若正在編輯繪圖區,則會切換為「繪圖工具列」。「復原」、「重複」按鈕放置在視窗的右上角。
|
雖然 ![]() 運算區是運算格局的一部分,但您仍可根據自己的需求來調整 GeoGebra 介面的外觀。
運算區是運算格局的一部分,但您仍可根據自己的需求來調整 GeoGebra 介面的外觀。
建立物件
直接輸入
運算區讓您能利用 GeoGebra 的代數運算系統 (Computer Algebra System, CAS) 來進行符號運算。它由數個儲存格組成,而每個儲存格上方為指令欄,下方顯示輸出結果。這些指令欄的使用方式與一般的指令列幾乎相同,但有以下的差別:
- 您可使用任何未用過的變數名。範例: 在指令欄輸入
(a+b)^2後按下 Enter 鍵。您將得到 a²+2ab+b² 。 =用於方程式而:=用於設定變數。這表示當您輸入a=2並不會把 2 這個值指定給 a。更多細節請參閱變數設定。- 進行乘法運算時,必須明確地標示乘號。您可以在指令列輸入
a(b+c)或a*(b+c),但在 運算區只能輸入
a*(b+c)。
直接輸入的快捷鍵
您可在 ![]() 運算區使用下列快捷鍵,來求解或檢查輸入。
運算區使用下列快捷鍵,來求解或檢查輸入。
- Enter:執行代數運算
- Ctrl + Enter:執行數值運算 範例:
sqrt(2)輸出 1.41 - Alt + Enter:檢查輸入但不執行任何運算 範例:
b + b仍輸出 b + b.
a := 5,輸出結果為 5。
在 ![]() 運算區空白指令欄使用下列快捷鍵,可快速擷取上個儲存格的輸入或輸出:
運算區空白指令欄使用下列快捷鍵,可快速擷取上個儲存格的輸入或輸出:
- 空白 鍵:擷取上個儲存格的輸出。
):擷取上個儲存格的輸出並加上括號。=:擷取上個儲存格的輸入。
a := 5;。變數設定以及變數與其它視區之間的關聯
您可使用符號 := 來設定變數,例如:b := 5、a(n) := 2n + 3。
- 釋放變數名稱:如果要刪除某個變數,可使用
Delete[b]指令。 - 重新定義變數或函數:您可重新定義變數或函數,但必須在「原來的儲存格」操作,否則將被視為新變數,而且系統會自動賦予這個變數新的名稱。
通常,你所定義的變數或函數,都可共用於運算區及其他視區。例如:
- 若您在運算區定義
b:=5,則您可在其它視區使用 b 這個變數。 - 若您在其他視區定義函數
f(x)=x^2,您也可以在運算區使用這個函數。
:= 右式的運算結果,例如:當您鍵入 b:=5 只會輸出 5。方程式
- 您可使用一般的等號來輸入方程式,例如:
3x + 5 = 7。 - 四則運算您可對整個方程式做四則運算,這在逐步解方程式時很有用。 範例: 輸入
(3x + 5 = 7) - 5會同時對等式的兩邊減去 5。 - 左式或右式:使用
LeftSide[]和RightSide[]指令可傳回方程式的左式或右式。範例:LeftSide[3x + 5 = 7]傳回 3 x + 5,RightSide[3x + 5 = 7]則傳回 7。
參照其他列
如果在 ![]() 運算區要參照其他列,可使用下列兩種方式:
運算區要參照其他列,可使用下列兩種方式:
- 靜態參照:這種參照方式會複製被參照列的輸出結果,但假如被參照列的內容之後有被更動,參照列並不會自動更新。
#:複製前一列的輸出結果。#5:複製第 5 列的輸出結果。
- 動態參照:這種參照方式會插入被參照列的連結,若被參照列的內容之後有被更動,參照列會自動更新。
$:插入前一列輸出結果的連結。$5:插入第 5 列輸出結果的連結。
運算區指令
![]() 運算區有運算區專用的指令,讓您能在
運算區有運算區專用的指令,讓您能在 ![]() 運算區建立物件。只要在指令欄開始輸入指令名稱,GeoGebra 會跳出指令清單供您選擇。
運算區建立物件。只要在指令欄開始輸入指令名稱,GeoGebra 會跳出指令清單供您選擇。
運算區工具列
運算區工具列提供許多運算區工具,讓您能進行代數運算或數值運算。只要先輸入資料,再用滑鼠點擊對應的運算區工具即可。
Context Menus
Row Header Context Menu
Right click (MacOS: Ctrl-click) on a row header in order to show a Context Menu with the following options:
- Insert Above: Inserts an empty row above the current one.
- Insert Below: Inserts an empty row below the current one.
- Delete Row: Deletes the contents of the current row.
- Text: Toggles between the current result and a text showing the current result contained in the row, which allows the user to insert comments.
- Copy as LaTeX (GeoGebra Desktop): Copies the contents of the current row to your computer’s clipboard, allowing you to paste the contents e.g. in a Text object.
- 備註: To copy the contents of more than one CAS row as LaTeX, select the rows you want with Ctrl-click (MacOS: Cmd-click), then right-click (MacOS: Ctrl-click) on the row header and select Copy as LaTeX.
Cell Context Menu
In GeoGebra Desktop, right click (MacOS: Ctrl-click) on a CAS output cell in order to show a Context Menu with the following options:
- Copy: Copies the cell contents to the your computer’s clipboard. Then, right click on a new cell in order to show the Paste option.
- Copy as LaTeX: Copies the cell contents in LaTeX format to the your computer’s clipboard, so it can be pasted into a Text object or a LaTeX editor.
- Copy as LibreOffice Formula: Copies the cell contents in LibreOffice formula format to your computer’s clipboard, so it can be pasted in a word processing document.
- Copy as Image: Copies the cell contents in PNG format to your computer’s clipboard, so it can be pasted into an Image object or in a word processing document.
Display of Mathematical Objects
CAS View Style Bar
The CAS View Style Bar provides buttons to
 change the text style (
 bold and
  italics) and
  color
color- display a virtual keyboard (GeoGebra Desktop)
- display additional
 Views in the GeoGebra window (GeoGebra Web and Tablet Apps)
Showing CAS Objects in the  Graphics View
In the ![]() CAS View, the icon to the left of every row shows the current visibility state (shown or hidden) of the object defined in it (when possible). You may directly click on the little
CAS View, the icon to the left of every row shows the current visibility state (shown or hidden) of the object defined in it (when possible). You may directly click on the little ![]() Show / Hide Object icon in order to change the visibility status of the object in the
Show / Hide Object icon in order to change the visibility status of the object in the ![]() Graphics View.
Graphics View.