Difference between revisions of "CAS View"

(Partial selection version info) |
|||
| (58 intermediate revisions by 12 users not shown) | |||
| Line 1: | Line 1: | ||
| − | <noinclude>{{Manual Page}}[[Category:Manual (official)|{{PAGENAME}}]]</noinclude> | + | <noinclude>{{Manual Page}} |
| + | [[Category:Manual (official)|{{PAGENAME}}]] | ||
| + | </noinclude> | ||
| + | <noinclude>{{Manual Page|version=5.0}}</noinclude> | ||
{{gui|view}} | {{gui|view}} | ||
| − | { | + | =[[File:Menu_view_cas.svg|link=|24px]] CAS View User Interface= |
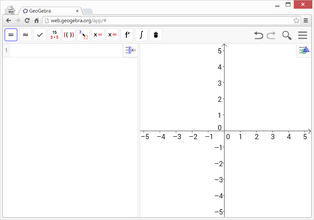
| − | == | + | By default, the [[File:Menu_view_cas.svg|link=|16px]] ''CAS View'' is opened next to the [[File:Menu_view_graphics.svg|link=|Graphics View|16px]] ''[[Graphics View]]''. Depending on which one of these two ''Views'' is active, either the [[CAS Tools|''CAS View Toolbar'']] or the [[Graphics Tools|''Graphics View Toolbar'']] is displayed at the top of the GeoGebra window, with the [[File:Menu-edit-undo.svg|link=|16px]][[File:Menu-edit-redo.svg|link=|16px]] ''Undo / Redo'' buttons in the top right corner. |
| + | {| cellpadding="10" | ||
| + | |[[File:CAS-View.png|left|link=|x220px]] | ||
| + | <br>CAS View | ||
| + | |} | ||
| + | The [[File:Menu_view_cas.svg|link=|16px]] ''CAS View'' is part of the [[File:Menu_view_cas.svg|link=|16px]] [[Perspectives#CAS Perspective|''CAS Perspective'']], although you may [[GeoGebra_5.0_Desktop_vs._Web_and_Tablet_App#Customizing_the_Layout_of_the_User_Interface|change the layout]] of GeoGebra's user interface according to your needs. | ||
| − | + | =Creating Mathematical Objects= | |
| − | + | ==Direct Input== | |
| − | * | + | The [[File:Menu_view_cas.svg|link=|16px]] ''CAS View'' allows you to use GeoGebra's CAS (Computer Algebra System) for symbolic computations. It consists of cells with an ''Input Field'' at the top and output display at the bottom. You can use these ''Input Fields'' in the same way as the normal ''[[Input Bar]]'', with the following differences: |
| − | * | + | * You can use variables that were not assigned any value. |
| − | + | * <code>=</code> is used for equations and <code>:=</code> for assignments. This means that the input <code>a=2</code> will not assign value 2 to ''a''. See the [[#Variable Assignments and Connection with other Views|section about assignments]] for details. | |
| − | + | * Multiplication needs to be marked explicitly. While in the ''[[Input Bar]]'' you can use both <code>a(b+c)</code> and <code>a*(b+c)</code> for multiplication, in the [[File:Menu_view_cas.svg|link=|16px]] ''CAS View'' only <code>a*(b+c)</code> is valid. | |
| − | |||
| − | ==Toolbar== | + | ==Keyboard Shortcuts for Direct Input== |
| + | In the [[File:Menu_view_cas.svg|link=|16px]] ''CAS View'' of GeoGebra´s Desktop Version the following keyboard shortcuts help you to evaluate or check your input. | ||
| + | {{note|Instead of using these keyboard shortcuts, you may also use the corresponding [[CAS Tools|''Tools'']] of the [[#CAS View Toolbar|''CAS View Toolbar'']].}} | ||
| + | * {{KeyCode|Enter}}: Evaluates your input. | ||
| + | {{notes|1=<div> | ||
| + | *Assignments are always evaluated, e.g. <code>a := 5</code> | ||
| + | *You may suppress any output with a semicolon at the end of your input, e.g. <code>a := 5;</code></div>.}} | ||
| − | * | + | ==Variable Assignments and Connection with other Views== |
| − | * You | + | You may use the <code>:=</code> notation for assignments, e.g. <code>b := 5</code>, <code>a(n) := 2n + 3</code>. |
| + | * ''Free up a name'': Use <code>Delete[b]</code> in order to free up a variable name again. | ||
| + | * ''Redefine a variable or function'': You may redefine a variable or function, but you must do so '''in the same cell''', otherwise it will be treated as a new variable and automatically renamed. | ||
| − | + | Variables and functions are always shared between the [[File:Menu_view_cas.svg|link=|16px]] ''CAS View'' and the other ''Views'' if possible. For example: | |
| − | == | + | *If you define <code>b:=5</code> in the [[File:Menu_view_cas.svg|link=|16px]] ''CAS View'', then you can use ''b'' in all the other ''Views'' of GeoGebra. |
| + | *If you define a function <code>f(x)=x^2</code> in another ''View'', you can also use this function in the [[File:Menu_view_cas.svg|link=|16px]] ''CAS View''. | ||
| − | + | {{note|1=<div>The output will always be just the expression '''after''' the <code>:=</code>, e.g. if you type <code>b:=5</code> the output will be ''5''. Please also note, that for clarification actually ''b := 5'' will be displayed.</div>}} | |
| − | |||
| − | |||
| − | |||
| − | = | ||
| − | |||
| − | |||
| − | |||
| − | |||
| − | |||
| − | |||
| − | |||
| − | |||
| − | |||
| − | |||
| − | |||
| − | |||
| − | |||
==Equations== | ==Equations== | ||
| + | * You may write equations using the simple ''Equals'' sign, e.g. <code>3x + 5 = 7</code>. | ||
| + | * ''Arithmetic operations'': You can perform arithmetic operations on equations, which is useful for manual equation solving. {{Example|1=<code>(3x + 5 = 7) - 5</code> subtracts 5 from both sides of the equation.}} | ||
| + | * ''Extracting one Side'': You may extract either the left or right side of an equation by using the commands <code>LeftSide[]</code> and <code>RightSide[]</code>. {{Example|1=<code>LeftSide[3x + 5 = 7]</code> returns ''3 x + 5'' and <code>RightSide[3x + 5 = 7]</code> returns ''7'' }} | ||
| − | + | ==Row References== | |
| − | + | You can refer to other rows in the [[File:Menu_view_cas.svg|link=|16px]] ''CAS View'' in two ways: | |
| − | + | * '''Static row references''' copy the output and '''won't be updated''' if the ''referenced'' row is subsequently changed | |
| − | + | ** <code><nowiki>#</nowiki></code>: Copies the previous output. | |
| − | == | + | ** <code><nowiki>#5</nowiki></code>: Copies the output of row 5. |
| − | + | * '''Dynamic row references''' insert a reference to another row instead of the actual output and therefore '''will be updated''' if the ''referenced'' row is subsequently changed | |
| − | You can | + | ** <code><nowiki>$</nowiki></code>: Inserts a reference to the previous output. |
| − | + | ** <code><nowiki>$</nowiki>5</code>: Inserts a reference to the output of row 5 | |
| − | |||
| − | |||
| − | |||
| − | |||
| − | |||
| − | |||
| − | * | ||
| − | |||
| − | |||
| − | |||
| − | |||
| − | |||
| − | ** | ||
| − | |||
| − | ** | ||
| − | * | ||
| − | ** | ||
| − | |||
| − | ** | ||
| − | |||
| − | |||
| − | + | =CAS Commands= | |
| − | + | GeoGebra also offers a wide range of ''[[CAS Commands]]'' that can be used to create objects in the [[File:Menu_view_cas.svg|link=|16px]] ''CAS View''. Just start typing the name of a ''Command'' into the ''Input Field'' and GeoGebra will offer you a list of ''Commands'' that match your input. | |
| − | |||
| − | |||
| − | |||
| − | |||
| − | |||
| − | + | {{note|For a complete list of ''Commands'' see section [[CAS Commands]].}} | |
| − | + | {{note|From GeoGebra 5.0 onwards, the [[File:Menu_view_cas.svg|link=|16px]] ''CAS View'' supports exact versions of [[CAS View Supported Geometry Commands|some ''Geometry Commands'']]}}. | |
| − | |||
| − | + | =CAS View Toolbar= | |
| − | + | The [[CAS Tools|''CAS View Toolbar'']] provides a range of ''[[CAS Tools]]'' that allow you to evaluate input and perform calculations. Just enter your input and select the corresponding ''CAS Tool'' afterwards in order to apply it to your input. | |
| − | + | [[File:Toolbar-CAS.png|left|link=CAS Tools|x32px]] | |
| − | + | <br> | |
| + | <br> | ||
| − | + | {{hint|In GeoGebra Classic 5 you may select part of the input text to only apply the operation to this selected part. This feature is not available in Classic 6 at the moment.}} | |
| − | + | {{note|For a complete list of ''Tools'' see ''[[CAS Tools]]''.}} | |
| − | |||
| − | |||
| − | * | + | =Context Menus= |
| − | * | + | ==Row Header Context Menu== |
| − | + | In the GeoGebra Desktop Version you can right click (MacOS: {{KeyCode|Ctrl}}-click) on a row header in order to show a ''Context Menu'' with the following options: | |
| + | * '''Insert Above''': Inserts an empty row above the current one. | ||
| + | * '''Insert Below''': Inserts an empty row below the current one. | ||
| + | * '''Delete Row''': Deletes the contents of the current row. | ||
| + | * '''Text''': Toggles between the current result and a text showing the current result contained in the row, which allows the user to insert comments. | ||
| + | * '''Copy as LaTeX''' (GeoGebra Desktop): Copies the contents of the current row to your computer’s clipboard, allowing you to paste the contents e.g. in a [[Text]] object. | ||
| + | : {{note|1=To copy the contents of more than one CAS row as LaTeX, select the rows you want with {{KeyCode|Ctrl}}-click (MacOS: {{KeyCode|Cmd}}-click), then right-click (MacOS: {{KeyCode|Ctrl}}-click) on the row header and select ''Copy as LaTeX''.}} | ||
| − | + | ==Cell Context Menu== | |
| − | * | + | In the GeoGebra Desktop Version you can right click (MacOS: {{KeyCode|Ctrl}}-click) on a CAS output cell in order to show a ''Context Menu'' with the following options: |
| − | * | + | * '''Copy''': Copies the cell contents to the your computer’s clipboard. Then, right click on a new cell in order to show the '''Paste''' option. |
| + | * '''Copy as LaTeX''': Copies the cell contents in LaTeX format to the your computer’s clipboard, so it can be pasted into a [[Text]] object or a LaTeX editor. | ||
| + | * '''Copy as LibreOffice Formula''': Copies the cell contents in LibreOffice formula format to your computer’s clipboard, so it can be pasted in a word processing document. | ||
| + | * '''Copy as Image''': Copies the cell contents in PNG format to your computer’s clipboard, so it can be pasted into an [[Image Tool|Image]] object or in a word processing document. | ||
| − | == | + | =Display of Mathematical Objects= |
| + | ==[[Style_Bar#CAS_View_Style_Bar|CAS View Style Bar]]== | ||
| + | The [[Style_Bar#CAS_View_Style_Bar|''CAS View Style Bar'']] provides buttons to | ||
| + | *[[File:Stylingbar_text.svg|link=|16px]] change the text style ([[File:Stylingbar_text_bold.svg|link=|16px]] '''bold''' and [[File:Stylingbar_text_italic.svg|link=|16px]] ''italics'') and [[File:Stylingbar_color_white.svg|link=|16px]] color | ||
| + | *display a [[File:cas-keyboard.png|link=|16px]] virtual keyboard (GeoGebra Desktop) | ||
| + | *display additional [[File:Stylingbar_dots.svg|link=|16px]] [[Views|''Views'']] in the GeoGebra window (GeoGebra Web and Tablet Apps) | ||
| − | + | ==Showing CAS Objects in the [[File:Menu_view_graphics.svg|link=|Graphics View|20px]] ''Graphics View''== | |
| − | = | + | In the [[File:Menu_view_cas.svg|link=|16px]] ''CAS View'', the icon to the left of every row shows the current visibility state (shown or hidden) of the object defined in it (when possible). You may directly click on the little [[File:Mode_showhideobject.svg|link=|16px]] ''Show / Hide Object'' icon in order to change the visibility status of the object in the [[File:Menu_view_graphics.svg|link=|Graphics View|16px]] ''[[Graphics View]]''. |
| − | |||
Latest revision as of 09:48, 24 August 2020
 CAS View User Interface
By default, the ![]() CAS View is opened next to the
CAS View is opened next to the ![]() Graphics View. Depending on which one of these two Views is active, either the CAS View Toolbar or the Graphics View Toolbar is displayed at the top of the GeoGebra window, with the
Graphics View. Depending on which one of these two Views is active, either the CAS View Toolbar or the Graphics View Toolbar is displayed at the top of the GeoGebra window, with the ![]()
![]() Undo / Redo buttons in the top right corner.
Undo / Redo buttons in the top right corner.
|
The ![]() CAS View is part of the
CAS View is part of the ![]() CAS Perspective, although you may change the layout of GeoGebra's user interface according to your needs.
CAS Perspective, although you may change the layout of GeoGebra's user interface according to your needs.
Creating Mathematical Objects
Direct Input
The ![]() CAS View allows you to use GeoGebra's CAS (Computer Algebra System) for symbolic computations. It consists of cells with an Input Field at the top and output display at the bottom. You can use these Input Fields in the same way as the normal Input Bar, with the following differences:
CAS View allows you to use GeoGebra's CAS (Computer Algebra System) for symbolic computations. It consists of cells with an Input Field at the top and output display at the bottom. You can use these Input Fields in the same way as the normal Input Bar, with the following differences:
- You can use variables that were not assigned any value.
=is used for equations and:=for assignments. This means that the inputa=2will not assign value 2 to a. See the section about assignments for details.- Multiplication needs to be marked explicitly. While in the Input Bar you can use both
a(b+c)anda*(b+c)for multiplication, in the CAS View only
 a*(b+c)is valid.
Keyboard Shortcuts for Direct Input
In the ![]() CAS View of GeoGebra´s Desktop Version the following keyboard shortcuts help you to evaluate or check your input.
CAS View of GeoGebra´s Desktop Version the following keyboard shortcuts help you to evaluate or check your input.
- Enter: Evaluates your input.
- Assignments are always evaluated, e.g.
a := 5 - You may suppress any output with a semicolon at the end of your input, e.g.
a := 5;
Variable Assignments and Connection with other Views
You may use the := notation for assignments, e.g. b := 5, a(n) := 2n + 3.
- Free up a name: Use
Delete[b]in order to free up a variable name again. - Redefine a variable or function: You may redefine a variable or function, but you must do so in the same cell, otherwise it will be treated as a new variable and automatically renamed.
Variables and functions are always shared between the ![]() CAS View and the other Views if possible. For example:
CAS View and the other Views if possible. For example:
- If you define
b:=5in the CAS View, then you can use b in all the other Views of GeoGebra. - If you define a function
f(x)=x^2in another View, you can also use this function in the CAS View.
:=, e.g. if you type b:=5 the output will be 5. Please also note, that for clarification actually b := 5 will be displayed.Equations
- You may write equations using the simple Equals sign, e.g.
3x + 5 = 7. - Arithmetic operations: You can perform arithmetic operations on equations, which is useful for manual equation solving. Example:
(3x + 5 = 7) - 5subtracts 5 from both sides of the equation.
- Extracting one Side: You may extract either the left or right side of an equation by using the commands
LeftSide[]andRightSide[].Example:LeftSide[3x + 5 = 7]returns 3 x + 5 andRightSide[3x + 5 = 7]returns 7
Row References
You can refer to other rows in the ![]() CAS View in two ways:
CAS View in two ways:
- Static row references copy the output and won't be updated if the referenced row is subsequently changed
#: Copies the previous output.#5: Copies the output of row 5.
- Dynamic row references insert a reference to another row instead of the actual output and therefore will be updated if the referenced row is subsequently changed
$: Inserts a reference to the previous output.$5: Inserts a reference to the output of row 5
CAS Commands
GeoGebra also offers a wide range of CAS Commands that can be used to create objects in the ![]() CAS View. Just start typing the name of a Command into the Input Field and GeoGebra will offer you a list of Commands that match your input.
CAS View. Just start typing the name of a Command into the Input Field and GeoGebra will offer you a list of Commands that match your input.
.
CAS View Toolbar
The CAS View Toolbar provides a range of CAS Tools that allow you to evaluate input and perform calculations. Just enter your input and select the corresponding CAS Tool afterwards in order to apply it to your input.
Context Menus
Row Header Context Menu
In the GeoGebra Desktop Version you can right click (MacOS: Ctrl-click) on a row header in order to show a Context Menu with the following options:
- Insert Above: Inserts an empty row above the current one.
- Insert Below: Inserts an empty row below the current one.
- Delete Row: Deletes the contents of the current row.
- Text: Toggles between the current result and a text showing the current result contained in the row, which allows the user to insert comments.
- Copy as LaTeX (GeoGebra Desktop): Copies the contents of the current row to your computer’s clipboard, allowing you to paste the contents e.g. in a Text object.
- Note: To copy the contents of more than one CAS row as LaTeX, select the rows you want with Ctrl-click (MacOS: Cmd-click), then right-click (MacOS: Ctrl-click) on the row header and select Copy as LaTeX.
Cell Context Menu
In the GeoGebra Desktop Version you can right click (MacOS: Ctrl-click) on a CAS output cell in order to show a Context Menu with the following options:
- Copy: Copies the cell contents to the your computer’s clipboard. Then, right click on a new cell in order to show the Paste option.
- Copy as LaTeX: Copies the cell contents in LaTeX format to the your computer’s clipboard, so it can be pasted into a Text object or a LaTeX editor.
- Copy as LibreOffice Formula: Copies the cell contents in LibreOffice formula format to your computer’s clipboard, so it can be pasted in a word processing document.
- Copy as Image: Copies the cell contents in PNG format to your computer’s clipboard, so it can be pasted into an Image object or in a word processing document.
Display of Mathematical Objects
CAS View Style Bar
The CAS View Style Bar provides buttons to
 change the text style (
 bold and
  italics) and
  color
color- display a
 virtual keyboard (GeoGebra Desktop)
 - display additional
 Views in the GeoGebra window (GeoGebra Web and Tablet Apps)
Showing CAS Objects in the  Graphics View
In the ![]() CAS View, the icon to the left of every row shows the current visibility state (shown or hidden) of the object defined in it (when possible). You may directly click on the little
CAS View, the icon to the left of every row shows the current visibility state (shown or hidden) of the object defined in it (when possible). You may directly click on the little ![]() Show / Hide Object icon in order to change the visibility status of the object in the
Show / Hide Object icon in order to change the visibility status of the object in the ![]() Graphics View.
Graphics View.