Comments:Tutorial:EquilateralTriangle

Problem: How will you draw an equilateral triangle without using the Regular polygon tool?
You can follow this tutorial step by step by opening the GeoGebra window.
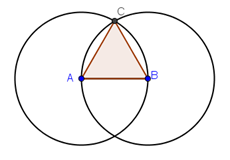
In this tutorial, we will mimic compass and straight edge construction using the circle tool. The idea is to use the intersections of two circles and the two centers to form as triangles as shown below.
Figure 1 - An equilateral triangle formed by radii of two circles
In constructing our triangle, we are going to learn how to use the circle tool, and how to display interior angle measure of a polygon and length of segments. Note that we can also draw a regular polygon of any side by using the Regular polygon tool.
1 We will not need the Algebra window and the Coordinate axes so we will hide them. To hide the Coordinate axes, click the View menu on the menu bar, and then click Axes. To hide the Algebra window, click View then click Algebra window.
2 Click the Segment between two points tool, and click two distinct places on the drawing pad to construct segment AB.
3 If the labels of the points are not displayed, click the Move button, right click each point and click Show label from the context menu. (The context menu is the pop-up menu that appears when you right click an object.)
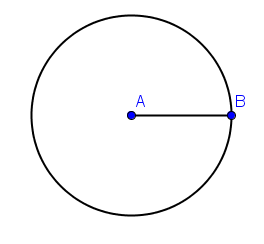
4 To construct a circle with center A passing through B, click the Circle with Center through Point tool, click point A, then click point B. After step 4, your drawing should look like the one shown in Figure 2.
Figure 2 - Circle with center A and passing through B.
5 To construct another circle with center B passing through A, with the Circle with Center though Point still active, click point B and then click point A.
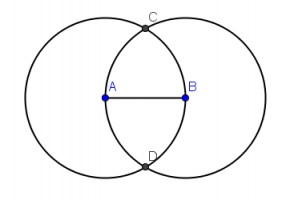
6 Next, we have to intersect the circles. To intersect the two circles, click the inverted triangle on the New Point tool, select Intersect Two Objects, then click the circumference of both circles. Notice that two points will appear in their intersections. After step 6, drawing should look like the one shown in Figure 2.
Figure 3 - Circles with radius AB and intersection C and D.
7 We only need three points, points A, B and C, to form an equilateral triangle, so we will hide the two circles, segment AB and point D. To do this, right click each object and click the Show Object option to uncheck it. In hiding segment AB, be sure that you do not click points A or B.
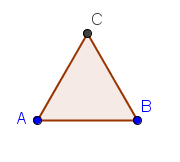
8 With only three points remaining on the drawing pad, click the Polygon tool and click the points in the following order: point A, point B, point C and then point A to close the polygon. After step 8, your drawing should look like the figure below. Note that in other versions, or depending on the setting, segment labels may appear.
Figure 4 - Triangle formed from radii of two circles
9 Using the Move button, move the vertices of the triangle. What do you observe? Notice that you can move vertex A and B but you can never move vertex C. This is because vertex C is a dependent object. Recall that vertex C is the intersection of two circles and thus depends on the length of segment AB.
10 You have probably observed that it seems that ABC is an equilateral triangle. In fact, it is. To verify, we can display the interior angles of the triangle. To do this, click the Angle tool, then click the interior of the triangle.
11 What do you observe? Move the vertices of the triangle. Is your observation still the same?
12 You can also verify the length of the sides using the Properties window. To do this, right click one of the sides of the triangle, click Object Properties from the context menu.
13 In the Object Properties window, select the Basic tab. Be sure that the Show label check box is checked and choose Value from the Show label drop down list box.
14 Select the other sides of the triangle in the Object list located at the left side of the Object Properties window and change the labels to Value, then close the window when you are done.
15 Prove that the construction above always results to an equilateral triangle.


